I. Love. Parties. All kinds. Whether for birthdays, baby showers, holidays, or sporting events, I’m always down for a good shindig.
And almost as equally, I love decorating for said parties. It’s far too easy to get caught up in the every day mundane and to let routine make us feel all “bleh.” So in my mind, a party is a good reason to access the creative/quirky/thrifty side (that we all secretly have, whether we realize it or not) and get to work.
This particular project was for a friend’s baby shower that I was hosting. My goal was to try, as much as possible, to use items I already had.
Now, let me just say this as one who lives less than 3 miles from a Hobby Lobby: it’s INSANELY easy to go in for some Sharpies and to leave with a cart full of decorating supplies. The place is simply magical and basically a black hole for anyone who is even remotely interested in being crafty. Because this is true, I did not allow myself to go back there — instead, I went to the usually-reliable-and-often-underestimated Dollar Store for my supply needs.
Here is my extensive supply list:
- 3 plastic table covers
- Scissors
- Tape
Crazy complicated, right?
Just do your best to stick with me.
I already had scissors and tape, so I paid $3.21 for 3 table cloths and laid them one on top of the other like so, using paperclips at the top to hold the edges together:

Now pay attention. Next, I cut all three covers into strips, leaving about 3 inches of the covers uncut at the top. I was doing this cutting during my son’s nap time (which, at that point in his life, was maybe 25 minutes), so the strips were far from even or straight since I was trying to work quickly — but it ended up not really making a difference by the time I finished:

Still with me? Ok now things get real complicated. Pick the spot where you want your backdrop to be, and then put it there. (I just used clear tape to attach it to a curtain rod — that way it was easy to hide from view).
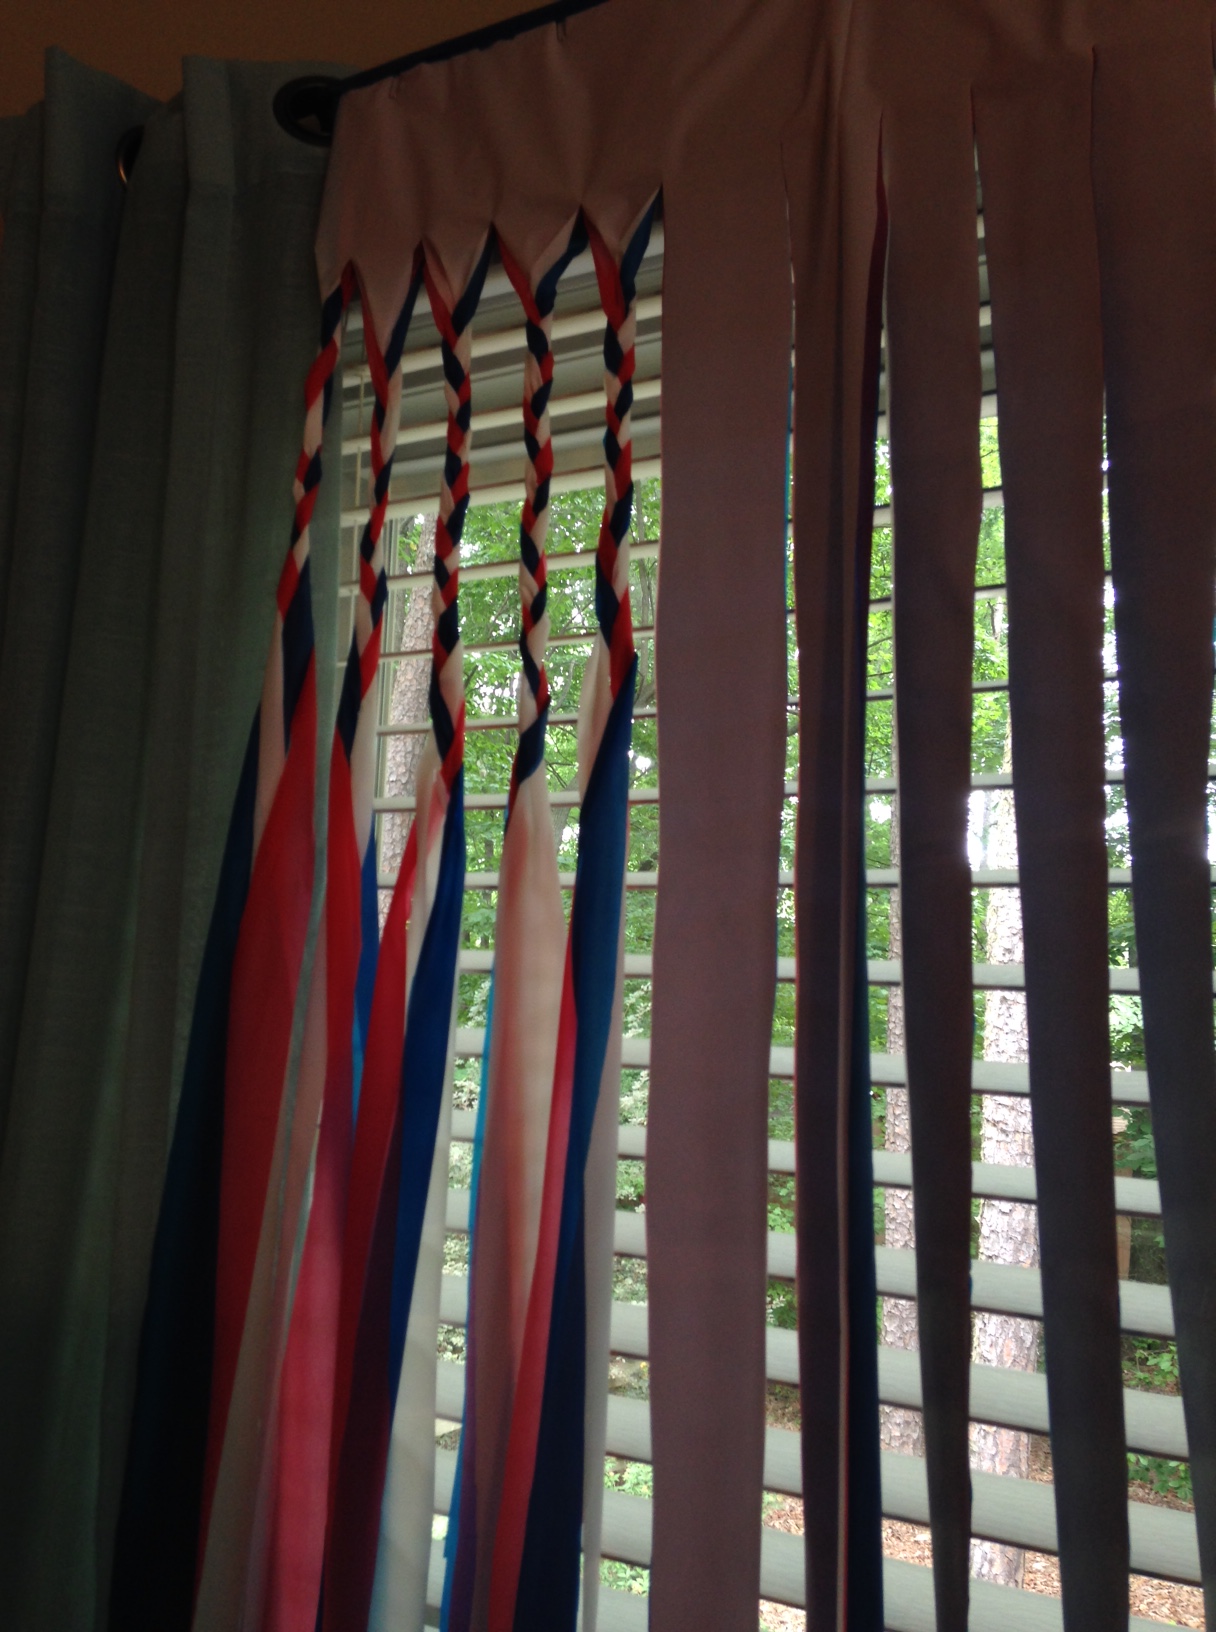
Next, take each section of strips, and braid the three colors together. I chose to stagger the braiding a little so that some strands were longer than others:

Aaaand you’re done! Crazy complicated right?
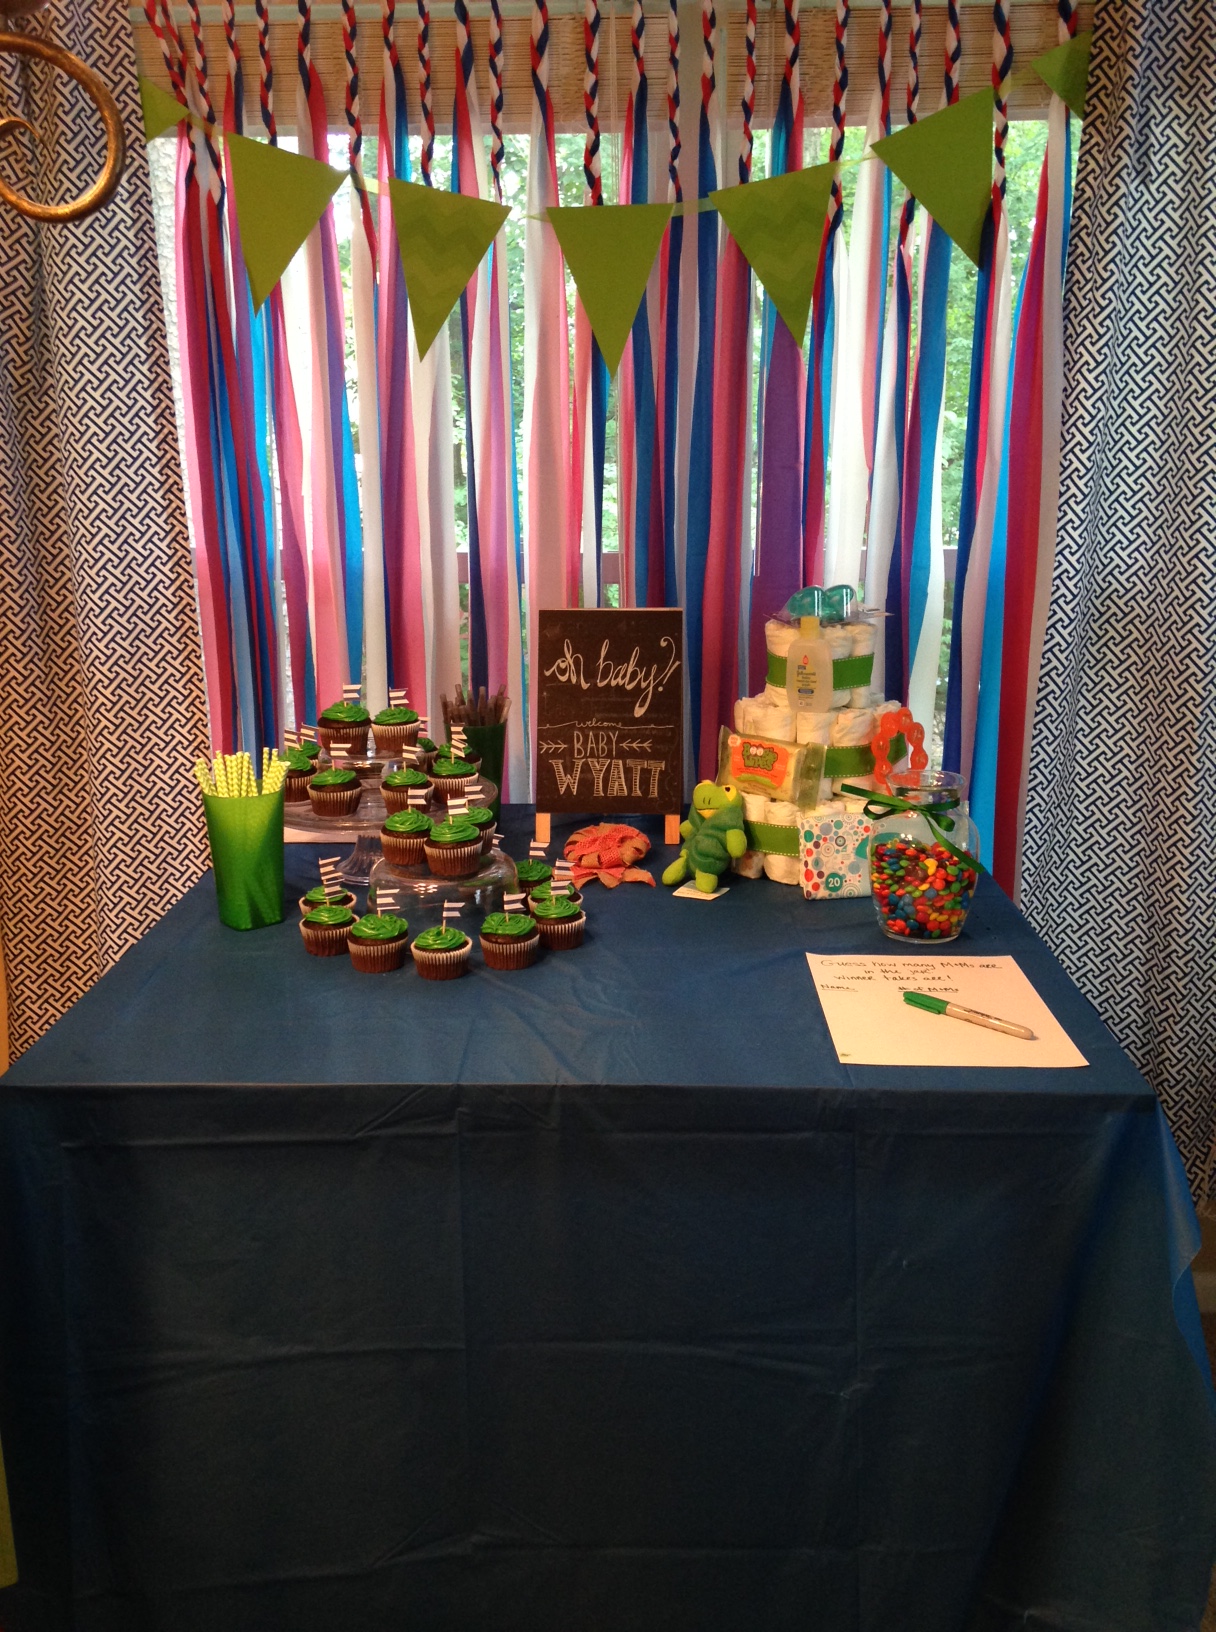
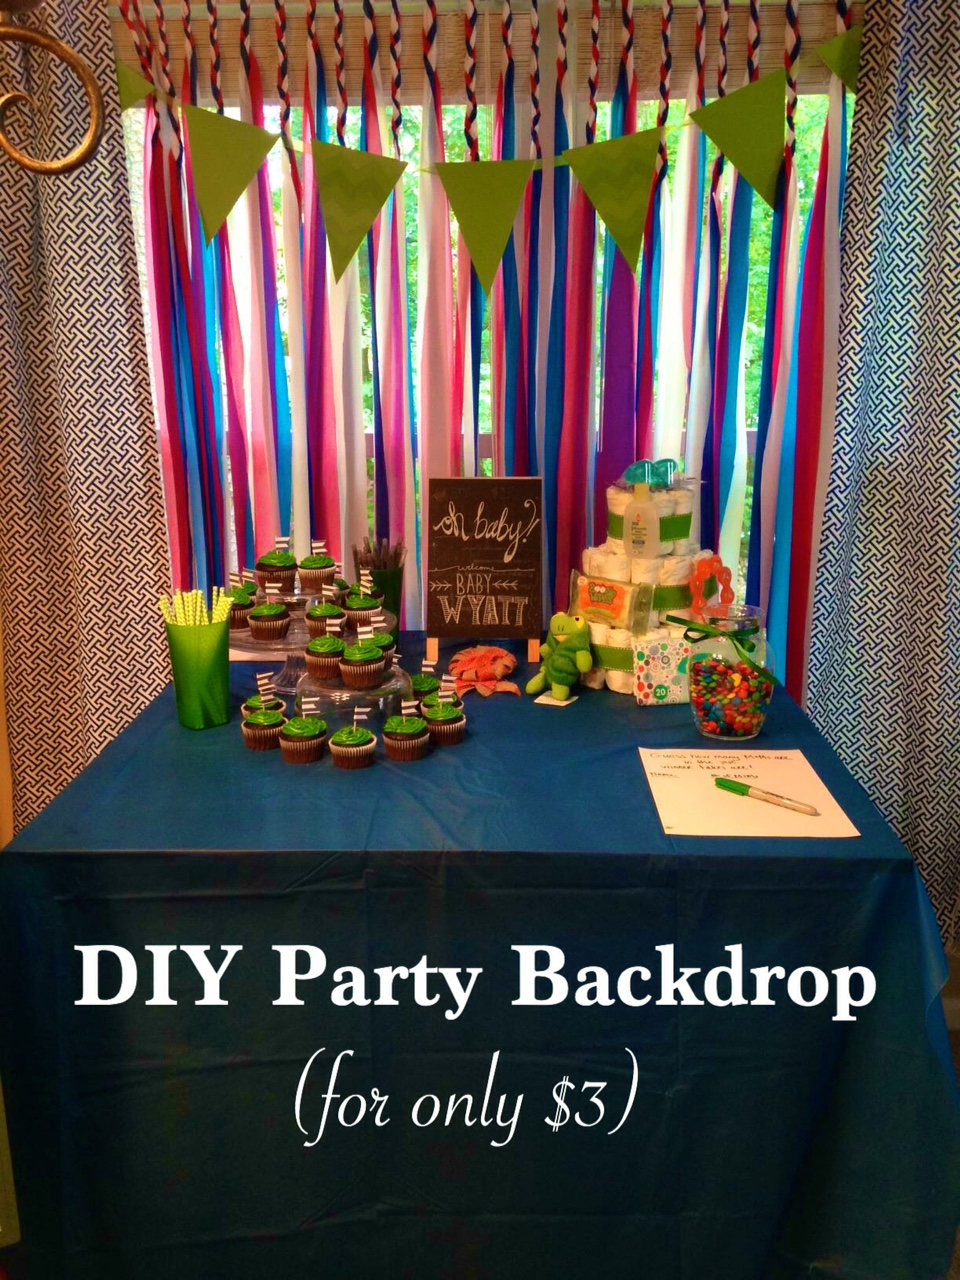
I thought the end product was pretty cute and — most importantly — affordable. This is a neat way to add a little something extra to any get together, and ultimately didn’t take much time either. I ended up tossing this after the party, but you could always use actual fabric instead so that it’s reusable for multiple events. This would also be a good option to use with the archway I made several months ago.
So the decorations turned out great and we had an awesome time celebrating the arrival of a new little one! Hope you’re able to use this idea to add a little pizzazz to your next gathering.
Until next time!