I’ve never done a DIY post before, but as much as I go to Pinterest for DIY ideas and direction, I figured I’d take a whack at posting my most recent DIY exploit – so here it goes!
As I’ve mentioned elsewhere on the blog, I previously worked for and now volunteer at Greensboro Pregnancy Care Center. I really believe in the mission of the Care Center (you can read more about that HERE), so I’ve tried to stay involved however possible since Benjamin arrived.
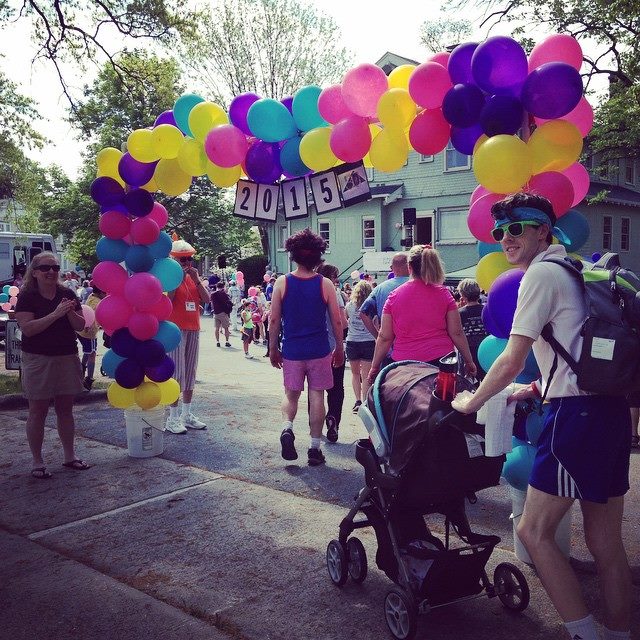
In April, the Center had its annual Walk for Life event, and I was asked to help make a balloon archway that:
1. Could be used again and again.
2. Wouldn’t require the use of helium (helium = high maintenance and apparently hard to come by these days due to a shortage. Weird.)
After talking to several people about what did and didn’t work for them, and also some good old fashioned trial and error, we ended up with an arch that turned out pretty awesome.
Below is a brief step-by-step on how to throw one of these puppies together!
Items Needed:
- PVC pipe: Lengths are entirely up to you. We wanted this archway to be 10 feet wide and about 8 feet high. To do this,
 we purchased 5 separate 5 foot pieces of 1-inch pipe – Approx. $3.30 each.
 - 2 PVC elbow fitting pieces (1 inch) – $0.69 each.
- 3 PVC coupling fitting pieces (1 inch) – $0.40 each.
- Two buckets – FREE – the Care Center had some extras
- 1 50 lb bag of Quikrete – $3.48
- Balloons: We made a total of 34 clusters; each cluster had four balloons for a total of 136 balloons. (This was the most expensive part. We purchased each color of balloons in bulk so that we could use for future events. We used OrientalTrading.com, but you can get your balloons wherever.)
- Ribbon to tie together clusters and to attach balloons to the arch
- Scissors
Step 1: Saw one 5 foot pipe piece in half to make two 2.5 foot pieces. These pieces will serve as the bases.
Step 2: You’ll need a few extra hands for this part. With one person holding one 2.5 foot piece standing straight up in the center of the bucket, have another person pour in half the bag of Quikrete. Add the appropriate amount of water (amounts are listed on the bag).
*We bought the fast setting Quikrete that didn’t even require mixing – so literally all you do is add water and allow it to set and harden.*
Repeat this step with the other bucket. Now you have your two bases!
Step 3: Now you simply “build” the remainder of the archway. Place one coupling piece on top of the 2.5 foot base. Then connect the 5 foot piece. The elbow piece goes on next. The elbow pieces on either side will con
nect the remaining two 5 foot pieces. The two 5 foot pieces across the top are connected by the last coupling piece.
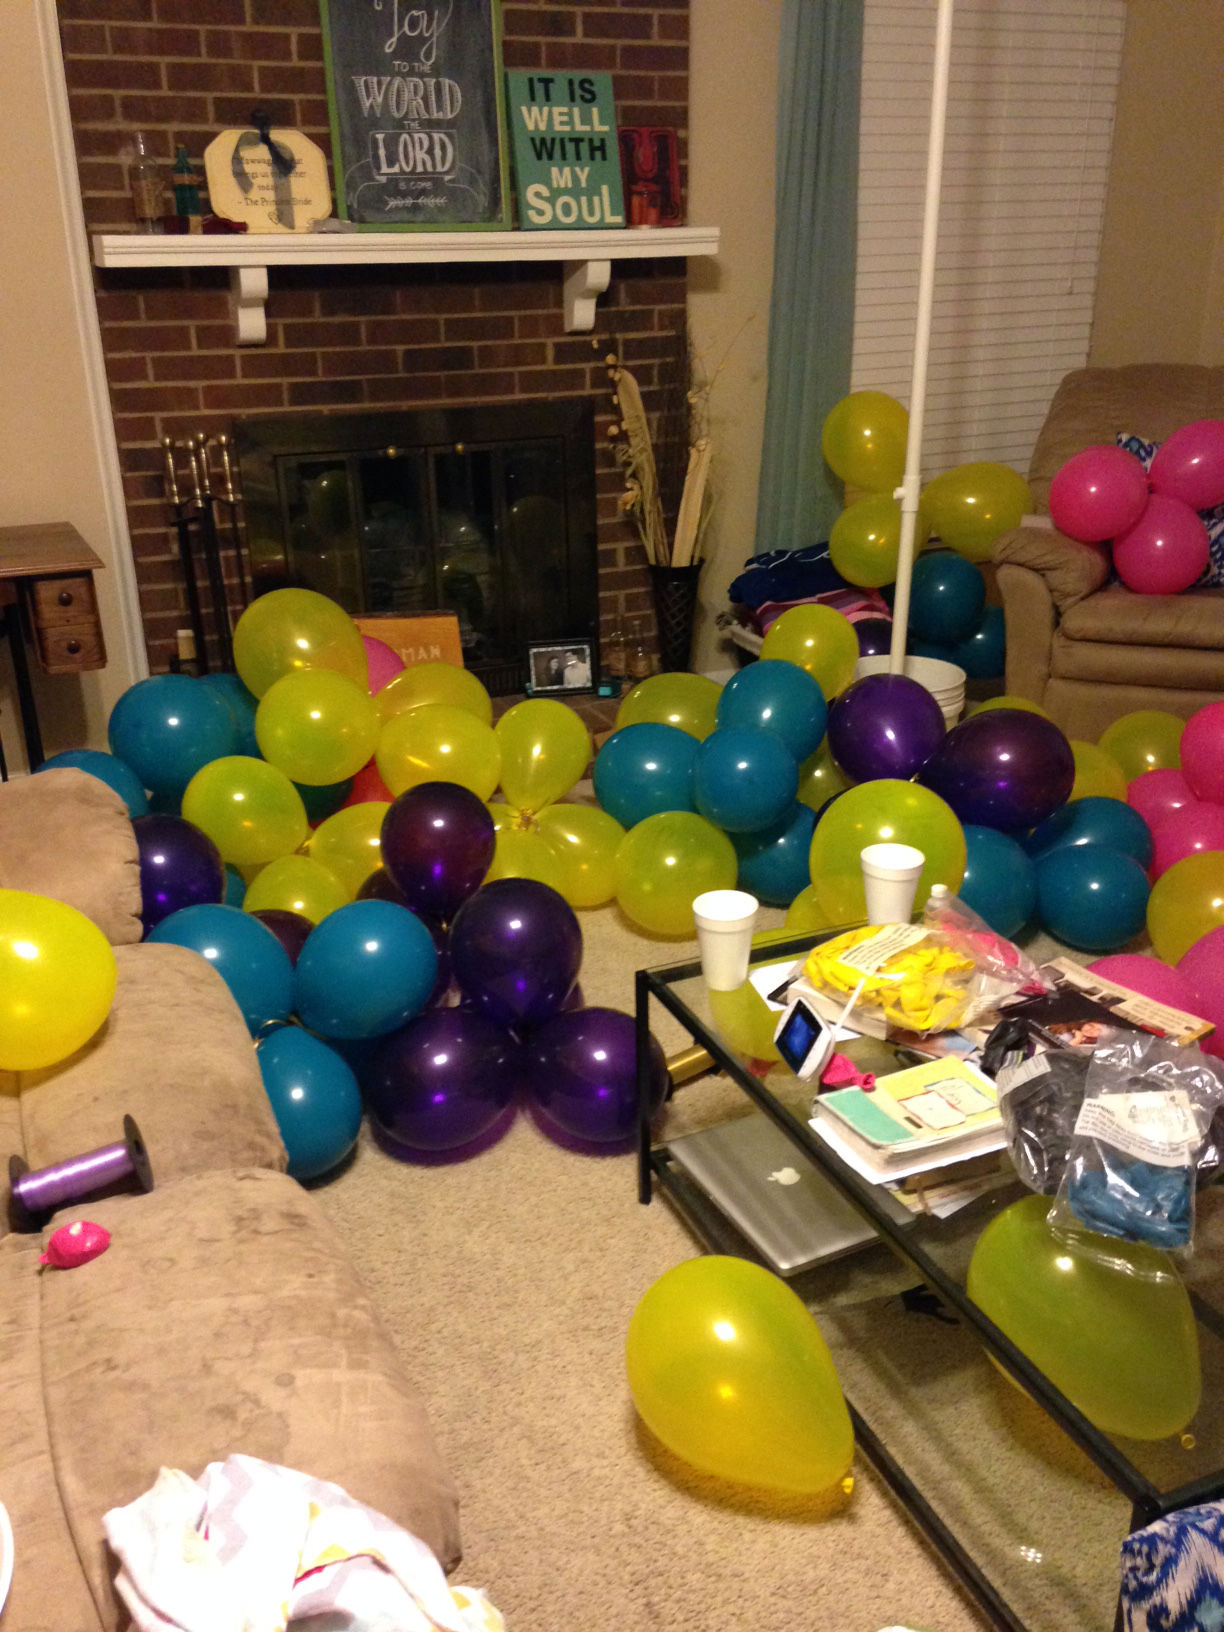 Step 4: The Balloons
For this size arch, we used 136 balloons (we made a few extra clusters in case there was some unintentional poppage).
Others who have made arches before suggested tying the balloon ends together to make clusters, but my fingers weren’t coordinated enough (or patient enough) for that, so I used ribbon tie two balloon ends together. I then tied two sets of balloons around each other to make one cluster of four. This also insured that the clusters wouldn’t accidentally come undone when being transported to the Care Center in trash bags.
Step 5: Attaching the balloons to the arch
I tied an extra long piece of ribbon to each cluster so that it could be easily tied onto the pipe by volunteers later. The clusters fit snuggly agai nst one another to hide the PVC pipe (see pic to the right).
And that’s it! We loaded all the balloons into giant trash bags so that volunteers could attach them to the arch the morning of the event. It definitely added a little pizzaz to the whole Walk!
I’m actually thinking of making my own arch (much smaller of course) so that I can use for birthday parties, baby showers, or
other special events. The design is versatile so that you can use it for balloons, or even hang a sheet, fabric, or curtains from it to make a backdrop for a photo booth. It’s a fun (and CHEAP) way to spice up the decorations at any event.
So that’s it and that’s all! Be on the lookout for more DIY projects in the future!
-Mary

One thought on “DIY: Balloon Archway”